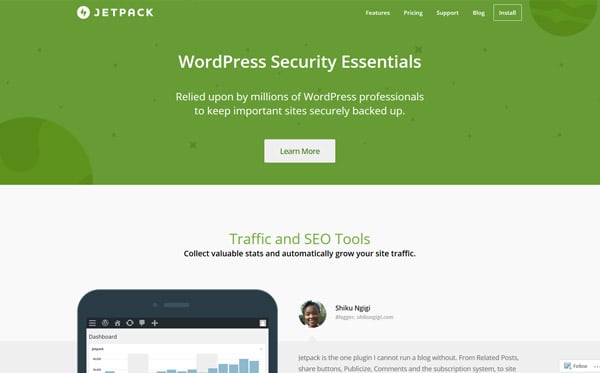
What would you say if I told you that you could add a whole bundle of helpful features to WordPress just by installing a single plugin? Sounds pretty cool, right? Well, you can…and that plugin is called Jetpack. But even though Jetpack has over 3 million active installs, many WordPress users still don’t know what Jetpack does and, more importantly, how they can use and benefit from Jetpack on their own site.
 Exclusive WPEngine Coupon Code for AlienWP Visitors!
Get 5 Months Free & 30% Off All Plans.
Click the coupon code to copy and open the link »
So…let’s change that. In this post, I’ll give you a detailed guide to Jetpack. You’ll learn:
- What the Jetpack plugin is
- How to install the Jetpack plugin
- How to use some of the popular Jetpack features
In More Detail…What is Jetpack for WordPress?
Jetpack is a massively popular plugin from Automattic, the same company behind WordPress.com. It tries to make your life significantly easier by giving self-hosted WordPress installs access to many of the same helpful features available to WordPress.com users.
In addition to connecting your self-hosted WordPress site to your WordPress.com account, it does this through a variety of individual modules that you can enable or disable at will. A module is basically a specific feature. Modules handle things like:
- Traffic stats and analytics
- Security with brute force prevention and malware scans
- Photon image CDN for faster page load times
- Backups and restores
- Contact forms
- Automatic social media promotion
- Social share buttons
- Image galleries
- Spell checking
Plus plenty of smaller features that aren’t on that list.
Some of these modules, like backups and restores, require a paid plan, but the free plan still offers plenty of helpful functionality. As I mentioned, you don’t need to use every single feature, either.
If you don’t want some of the features, you can easily disable specific modules on an individual basis (I’ll show you how to do this later on)
Guide to Jetpack: How to Install the Plugin
While the Jetpack plugin is listed at WordPress.org, the install process is a little bit more involved than some plugins you might be familiar with.
Don’t worry, though! It’s nothing too difficult. And I’ll show you how the whole thing works step-by-step.
Step 1: Install Jetpack From Your WordPress Dashboard
To get started, you need to install the Jetpack plugin. You can do this directly from your WordPress dashboard by going to Plugins → Add New and searching for Jetpack. Then click Install Now by Jetpack:
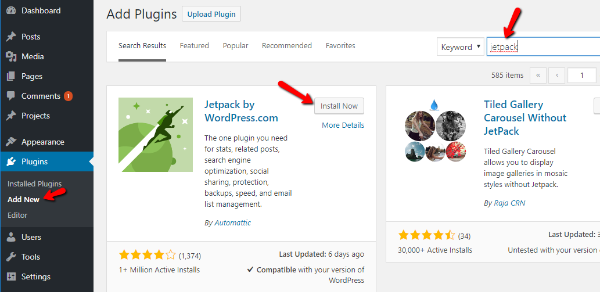
After the install process finishes, the Install Now button will change into an Activate button. Make sure to click that button in order to activate the Jetpack plugin.
Step 2: Connect Your WordPress.com Account
Once you activate Jetpack, you’ll see a prompt asking you to Connect to WordPress.com. Click that button to get started:
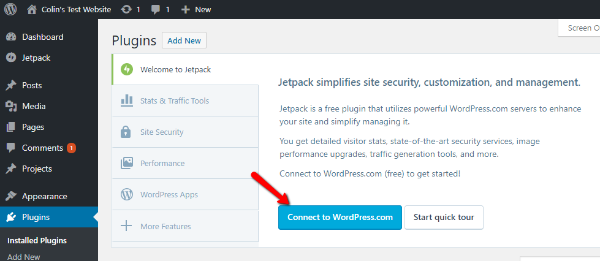
If you already have a WordPress.com account and are signed in, all you need to do is click the Approve button to connect your site.
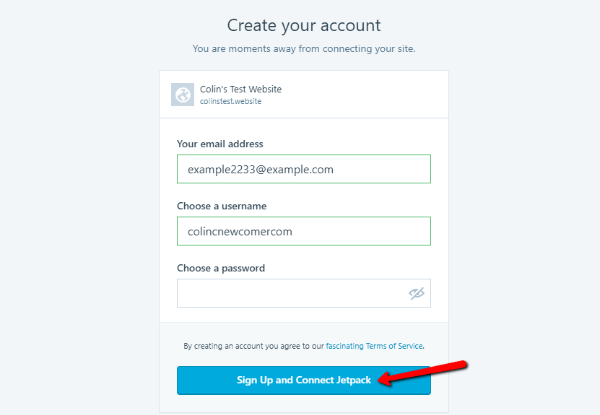
If you don’t have a WordPress.com account, you can follow the prompts to create a new account and connect your site:
Once you connect your site, you’ll see a big pricing table. Don’t worry – you don’t need to pay any money to use Jetpack (though you will miss out on some features if you don’t pay). To avoid paying, just click the Start with Free button:
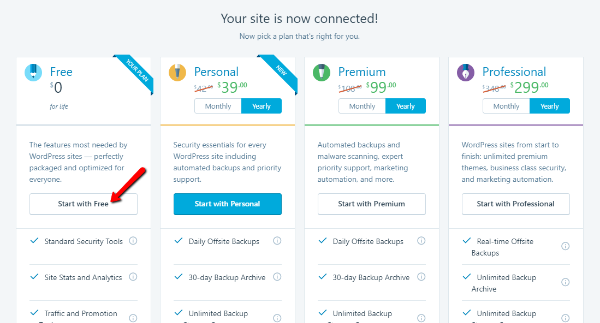
If you decide that you want those premium features later on, you can always upgrade at a later date.
Step 3: Activate Recommended Features
Once you select the free plan, Jetpack will prompt you to activate recommended features. You don’t have to do this. But I recommend it as a starting point because it enables a bunch of helpful features at once:
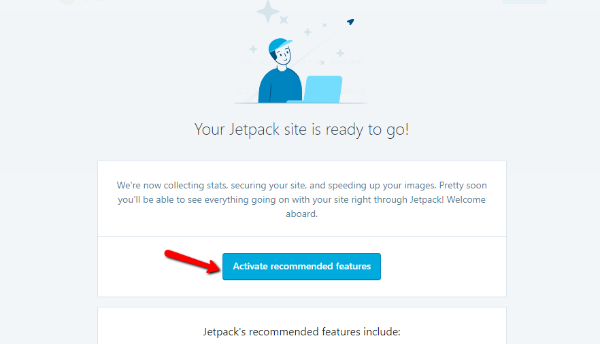
In the following sections, I’ll show you how you can go in and disable some individual modules if you decide that you don’t want any of these features later on.
And with that, you’re done the basic setup! Keep reading to learn how to use and enable/disable specific Jetpack modules.
Enabling Or Disabling Specific Jetpack Modules
Jetpack makes it easy to enable or disable specific modules whenever you want.
To manage the modules used on your site, go to Jetpack → Settings in your WordPress dashboard.
On the Settings page, Jetpack divides its modules into five different tabs.
To enable or disable any module, all you need to do is click the toggle button:
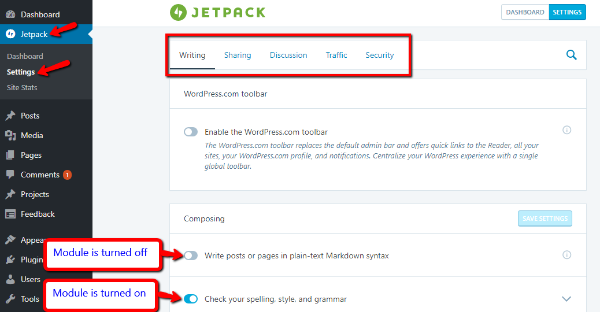
I recommend that you explore all of these different tabs because there are some small features that aren’t automatically enabled. You can hover over the “I” icon next to each feature to learn more about what it does.
How to Use Popular Jetpack Modules and Features
In this section, I’ll show you how to use some of Jetpack’s popular modules. All of these modules are available in the free plan.
I won’t show you every single module because that would take a whole textbook. But I will give you a look at the most popular modules.
How to Set Up Automatic Social Sharing
One especially helpful Jetpack module is one that lets you automatically share new posts to social media. If you activated the recommended features, Jetpack already turned this module on.
But in order to actually start sharing posts, you’ll need to connect your social media accounts so that Jetpack can post on your behalf.
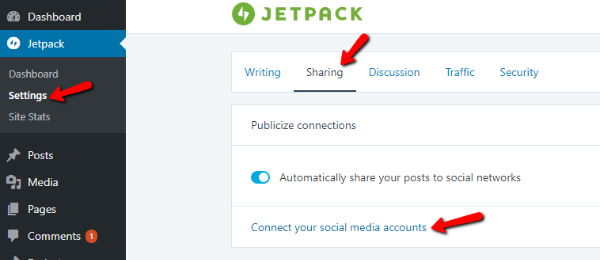
To do that, head to Jetpack → Settings and click on the Sharing tab. Then, under the Publicize connections module, click the link to Connect your social media accounts:
Jetpack will take you to your WordPress.com account where you can click the various buttons to Connect specific social networks:
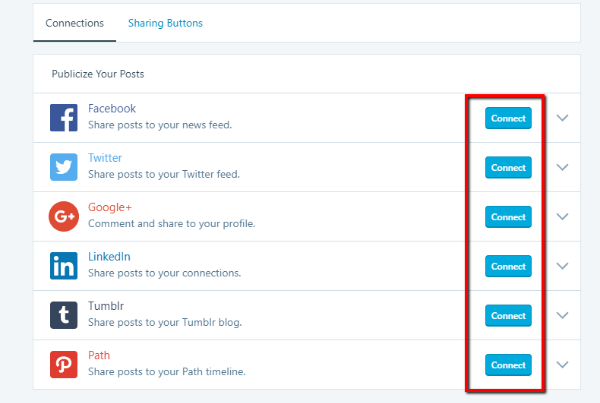
When you click the Connect button, you’ll need to follow the prompts to authorize WordPress.com to post to your social media account. This is necessary for the feature to function.
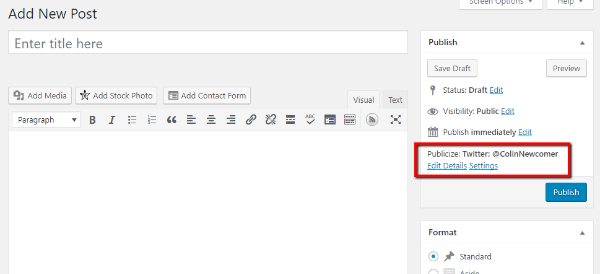
Once you connect some social media accounts, you can also customize social sharing settings in the WordPress Editor whenever you publish a new post:
How to Speed Up Image Load Times With Photon
Making your WordPress site load faster is something you should always strive for. There are lots of things that you can do to speed up your WordPress site. But one of the biggest things is using something called a content delivery network, or CDN.
A CDN speeds up your site by loading your site’s files from as near as possible to your visitor’s computer.
I don’t want to get too technical here – just trust me that CDNs are good for performance!
Jetpack includes a built-in CDN for your images called Photon. When you enable Photon, your images will load from WordPress.com’s servers instead of your own. This both lessens the load on your servers and speeds up your site.
To enable Jetpack’s Photon CDN, you need to head to Jetpack → Settings and scroll down to the Media section. Make sure that Speed up images and photos is enabled:
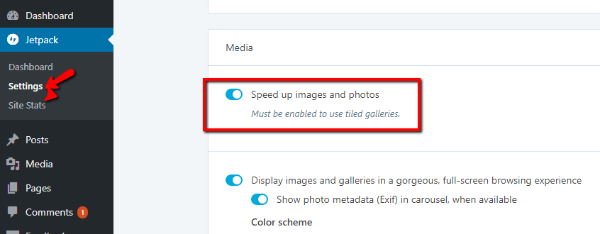
That’s all you need to do! Jetpack will now automatically serve up your images from WordPress.com’s servers instead of your own.
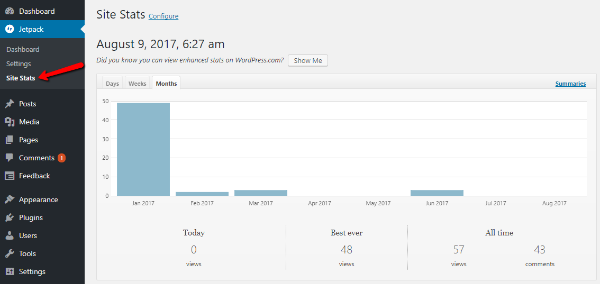
How to View Your Site’s Traffic Stats
One especially nice thing about Jetpack is that it makes it easy for you to track and view basic traffic statistics about your sites. That is, you can see which pages on your site get the most visitors and where those visitors come from.
While these traffic stats aren’t nearly as detailed as Google Analytics, they’re plenty informational for casual blogging.
Traffic stats are turned on by default, so you shouldn’t need to enable anything to start collecting data.
To view your site’s stats, head to Jetpack → Site Stats. On that first page, you’ll see a general overview of your site:
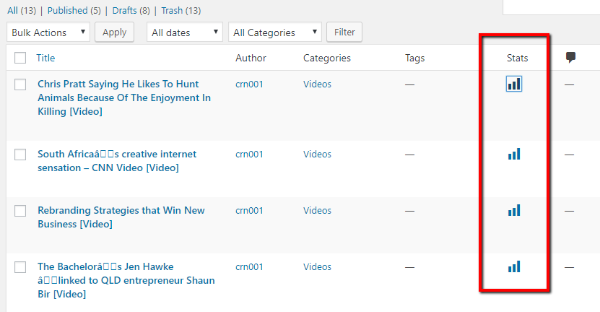
You can also view stats for individual posts or pages by going to the Posts or Pages tabs in your WordPress dashboard and looking at the Stats column:
How to Manage Your Site With the Calypso Interface
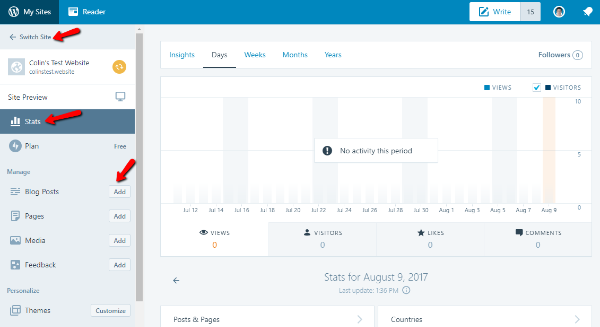
Because Jetpack syncs your self-hosted WordPress site with your WordPress.com account, you can manage your self-hosted site from the Calypso interface.
Again, without going into the technical details of Calypso, let’s just say that it’s an attempt to streamline many of the important functions of your WordPress site. From it, you can write posts and pages in a different interface, as well as manage other parts of your site.
One great thing about Calypso is that you can also manage multiple different WordPress installations from the same interface.
To access Calypso, all you need to do is go to WordPress.com like normal. From there, you can write posts, view stats, quickly switch between sites, and lots more:
You by no means have to use Calypso – it’s just a neat option you get with Jetpack. If you prefer the familiar WordPress interface, you’re 100% fine to completely ignore Calypso.
Wrapping Things Up
Jetpack is a great plugin for self-hosted WordPress users because it adds so many features in one fell swoop. While you can find separate plugins to add 99% of the features included with Jetpack, it’s definitely a lot more work.
For that reason, Jetpack is especially helpful for casual WordPress users who don’t want to deal with using ten different plugins to handle the features added by Jetpack.
Remember, to enable Jetpack, all you need to do is follow these basic steps:
- Install and activate the Jetpack plugin
- Connect to your WordPress.com account
- Enable/disable modules as needed
And that wraps up our guide to Jetpack. Let us know if you have any questions!


